Introduction to Starlink Mini Mount Installation
The success of a Starlink satellite internet setup depends heavily on proper installation, stability, and alignment. While Starlink’s advanced satellite network provides global coverage, the performance you experience at home, on the road, or in remote environments will be determined by how securely your equipment is mounted. The starlink mini mount plays a vital role in this process, ensuring that your dish remains stable, properly aligned, and positioned to maximize signal strength. Whether you are installing your system on a rooftop, RV, or remote cabin, understanding the correct way to install a starlink mini mount can mean the difference between flawless connectivity and constant interruptions.
Why Installation Matters for Signal Strength
Many users mistakenly believe that simply placing the Starlink dish outdoors will deliver maximum performance. In reality, signal strength depends on line-of-sight to satellites, stability against environmental conditions, and proper orientation. Even a small movement caused by wind or loose installation can degrade connectivity. A carefully installed starlink mini mount ensures that the dish is positioned in the best possible location, secured against environmental factors, and aligned to capture the strongest signals available.
Choosing the Best Starlink Mini Mount for Your Needs
Permanent Residential Installations
For homeowners, a roof or wall-mounted starlink mini mount is the most reliable option. These provide stability, keep the dish elevated above common obstructions, and are built to withstand long-term exposure to harsh weather.
Portable and Temporary Setups
RV owners, campers, and travelers benefit from portable options such as tripod mounts. A tripod starlink mini mount can be deployed in minutes, adjusted easily, and transported without hassle. This makes it an ideal choice for those who move frequently but still require stable internet connectivity.
Off-Grid and Remote Locations
For cabins, farms, or rural properties, pole-mounted solutions are effective. A pole starlink mini mount raises the dish above trees and other obstacles, ensuring clear access to satellites.
Tools and Materials Needed for Installation
Before beginning installation, prepare the tools and materials required for setting up a starlink mini mount. Common items include:
- Drill and drill bits
- Mounting brackets and hardware (included with the mount)
- Wrenches and screwdrivers
- Ladder (for roof or elevated installs)
- Leveling tool
- Weatherproof sealant (for outdoor permanent installations)
Having the right tools ensures the process is smooth, safe, and efficient.
Step-by-Step Guide: How to Install a Starlink Mini Mount
Step 1: Select the Right Location
Signal strength begins with choosing the correct location. The starlink mini mount should be positioned where the dish has an unobstructed view of the sky. Avoid trees, tall buildings, and utility poles that could interfere with line-of-sight. Starlink’s mobile app provides a “visibility” tool that helps users determine the best position before installation.
Step 2: Assemble the Mount
Follow the instructions provided with your starlink mini mount to assemble the base, brackets, or tripod legs. Ensure all bolts and screws are tightened securely before attaching the dish. For roof and wall mounts, this may involve pre-drilling holes and fastening mounting plates.
Step 3: Secure the Mount in Place
Depending on the mount type, secure it to the surface:
- Roof Mounts: Bolt the starlink mini mount directly into rafters or support beams for maximum stability. Use weatherproof sealant around drill points to prevent leaks.
- Wall Mounts: Attach to a solid, flat surface, ensuring the mount is level. Reinforce with anchors if attaching to masonry or brick.
- Tripod Mounts: Spread the tripod legs evenly on stable ground. For added security in windy areas, weigh down the legs with sandbags or heavy objects.
- Pole Mounts: Attach securely to a fence post, standalone pole, or elevated structure using U-bolts or clamps.
Step 4: Attach the Starlink Dish
Insert the dish into the starlink mini mount’s receiver bracket. Ensure it locks into place firmly and cannot be dislodged by wind or vibration. Double-check that the dish is angled correctly and facing the open sky.
Step 5: Adjust Alignment
Proper alignment is essential for maximum signal strength. The dish should face the sky at the correct angle, free from obstructions. Many starlink mini mount designs feature adjustable brackets that allow small directional changes. Use the Starlink app to test signal strength and fine-tune positioning until optimal performance is achieved.
Step 6: Connect Power and Test
Once secured and aligned, connect the dish to the Starlink router and power supply. Run a connectivity test to ensure the starlink mini mount is holding the dish steady and that the system maintains consistent performance.
Tips for Maximizing Signal Strength
Keep the Line-of-Sight Clear
Even partial obstructions can reduce speed or cause dropouts. Regularly inspect your starlink mini mount’s location to ensure new obstacles, like growing trees, don’t block visibility.
Reinforce for Harsh Weather
If you live in areas prone to strong winds, snow, or storms, reinforce your starlink mini mount with extra hardware or supports. This prevents shifts that could reduce alignment accuracy.
Adjust Seasonally if Necessary
In regions with heavy snow or seasonal changes, small adjustments to the starlink mini mount may be necessary to maintain optimal performance.
Common Mistakes to Avoid During Installation
- Loose Mounting Hardware: Failing to tighten bolts and screws can cause vibrations and poor alignment.
- Improper Location Choice: Installing too close to obstructions drastically reduces signal quality.
- Skipping Weatherproofing: Without sealant, roof or wall mounts may lead to leaks and long-term damage.
- Neglecting to Test Signal: Always run a connectivity test after installation to confirm optimal placement.
Starlink Mini Mount Options for Different Environments
Homes and Apartments
For permanent installations, roof and wall starlink mini mount designs are ideal. They offer stability, protection, and reliable long-term performance.
Vehicles and RVs
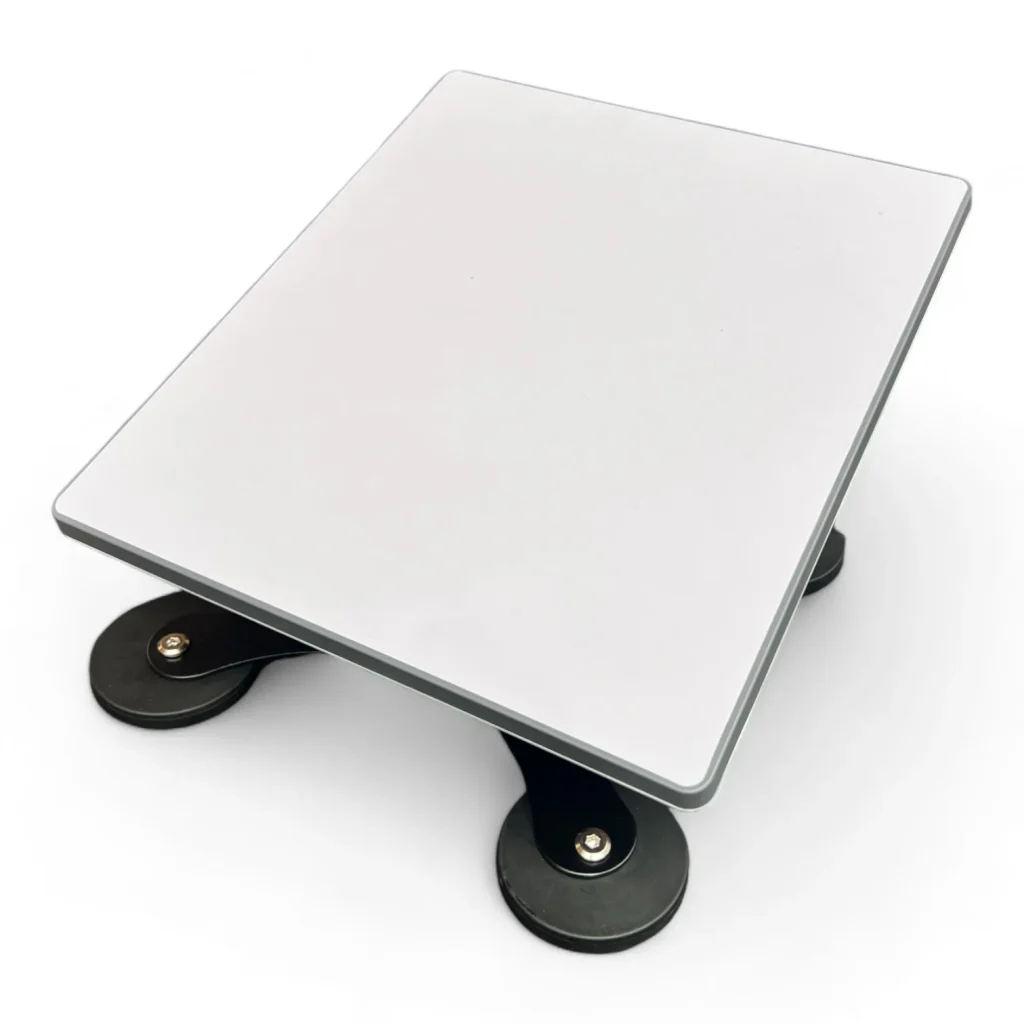
Portable tripod or magnetic roof mounts are preferred for vehicles. They allow internet access during travel and can be quickly disassembled when moving locations.
Rural and Off-Grid Areas
Pole-mounted systems are best for wide-open spaces or heavily wooded properties. Elevating the starlink mini mount increases signal reception by reducing interference from trees and uneven terrain.
Maintenance and Care for Long-Term Reliability
Regular Inspections
Inspect your starlink mini mount regularly for wear, corrosion, or loose parts. Tightening and replacing components when needed ensures safety and performance.
Cleaning the Dish and Mount
Remove debris, dirt, or snow buildup that may affect performance. Keeping the starlink mini mount clean extends its durability.
Protecting Against Extreme Weather
Apply protective coatings or reinforcements in regions with heavy rainfall, ice, or strong winds. This preserves the starlink mini mount’s integrity for years.
Benefits of Proper Starlink Mini Mount Installation
Installing a starlink mini mount correctly delivers numerous benefits:
- Stable, uninterrupted connectivity.
- Reduced maintenance and adjustments.
- Extended equipment lifespan.
- Enhanced performance in harsh conditions.
- Portability and adaptability for travelers.
Future of Starlink Mini Mount Technology
With Starlink’s rapid global expansion, mounting technology is advancing alongside. Future designs will feature lightweight materials, improved portability, and greater weather resistance. As satellite networks grow, the starlink mini mount will continue evolving to meet the demands of permanent residents, mobile users, and off-grid communities alike.
Conclusion
Installing a starlink mini mount properly is essential for achieving maximum signal strength and uninterrupted internet connectivity. From selecting the right location to securing and aligning the dish, every step plays a critical role in the overall performance of your Starlink system. Whether you are a homeowner, traveler, or off-grid user, understanding how to correctly install a starlink mini mount ensures long-lasting reliability, stability, and the best possible online experience.


